

Production Points

Product and Model Photography Points


Product and Model Photography Points
1
Define your objective and medium used
2
Define your target audience
3
Take great care with the writing
4
Consider the situation
5
Consider the importance of advanced preparation
6
Confirm the details of the photographed cuts
7
Consider the image processing
8
Data format of the delivered product
9
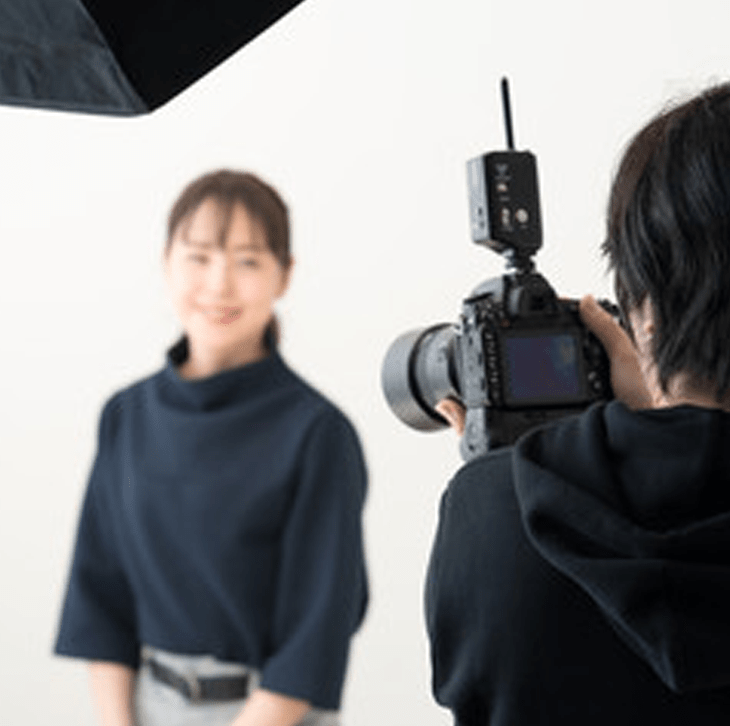
Product and Model Photography Process
10
Production Cost Examples
POINT
1
Define your objective and medium used
Photographs leave a big impression for your products and services in various mediums - from pamphlets and catalogs, to leaflets, magazines, posters, websites, and banner advertisements.
When taking photographs used in advertising ,you should clearly define the objective and medium used.
What kind of impression do you want to convey through the photographs? What do you want to promote the appeal of? After setting these objectives, construct the worldview and concept you want to convey, then think about the direction you want to take when constructing them - such as the tone, texture, and the kind of story you want to tell.
When taking photographs, it is important to keep in mind various factors. These include matching the characteristics of the medium used, the layout of the product or human model that will be the focus of the photograph, and choosing a suitable view angle, such as a vertical position or horizontal position.
POINT
2
Define your target audience
After taking photographs for advertising, it is important to narrow down your target audience by who the advertising is aimed at.
Different worldviews, concepts, and tones may be required of the same picture depending on the age group. Photographs used in women’s magazines, men’s magazines, youth magazines and elderly magazines all have different requirements.
By defining your target audience, you can clearly see the direction, including the writing and background image, the clothes and hairstyles for the models, and whether or not props will be used.
Deepening your understanding of the staff involved in shooting, such as the photographer, will lead to better completed photographs.
POINT
3
Take great care with the writing
The optimal photography method will differ depending on the materials, color, and shape of the product. Here, we show you some photography tricks for showing your product in a more appealing way.
Improve the metal quality
Before
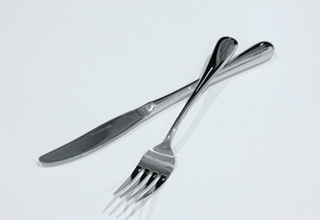
The angle that the light hits is bad, and a lustrous effect occurs due to the light hitting directly, but the surrounding space is accidentally captured in the photograph, and the product quality and shape is not expressed well.
After
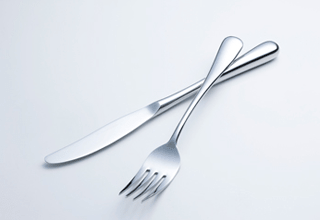
By using illumination from a surface light source, unwanted photographing of the surrounding area can be controlled and the product silhouette is clearly defined. Placing shadows in the edges expresses a metal quality that has contrast and balance.
Dazzling feeling of the product
Before
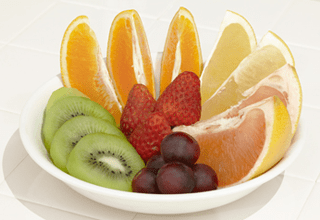
It doesn’t look that bad at first glance, but since the light is uniform across the entire picture, the juiciness of the fruit isn’t fully expressed.
After
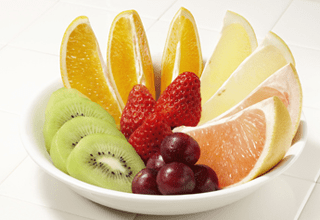
To emphasize the fruit flesh and the texture of the surface and to let viewers feel the juiciness, adjust the highlight placements and shadow castings with the lighting angle.
Producing transparency
Before
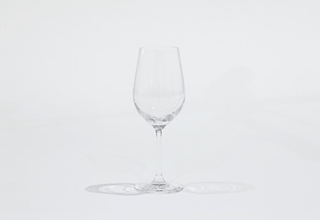
You can photograph transparently, but the edges of the product will melt into the white background, creating a photograph with a dim impression where viewers can’t understand the product shape.
After
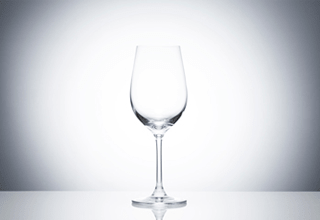
By adjusting the brightness in the glass by photographing the transmitted light that shines from the background, and imprinting black in the edges, you can produce transparency that does not damage the shape of the product.
POINT
4
Consider the situation
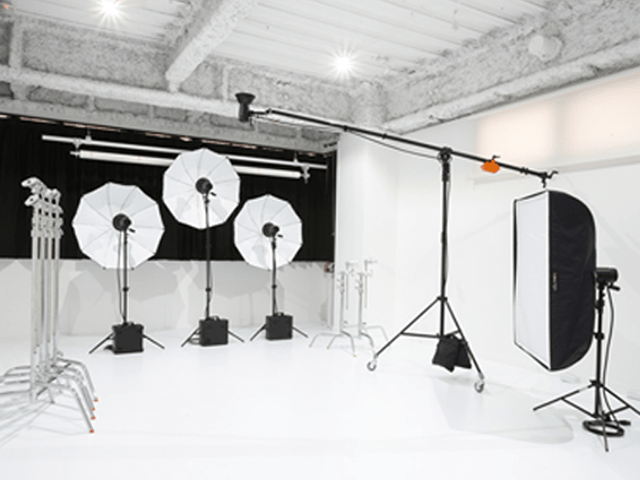
Choosing the most suitable place to photograph based on your concept is essential for making high quality advertising photographs.
You can think of various situations to shoot in, including outdoor locations such as boulevards, nature, and streets with buildings, photography studios that feature spaces where you can control the lighting in more detail, as well as pre-built house studios with backgrounds that represent spaces in daily life.
Utilizing the street's view is useful when choosing outdoor location points.
However there are a variety of factors to consider, including creative aspects such as the season and weather, and changes in impressions that light gives off depending on the time of day photographing takes place, as well as needing permission for photographing in parks, public facilities, and private spaces. These factors make location hunting very important.
In addition, when choosing a photography studio, you should confirm the space and equipment needed, and whether or not there are make up rooms and green rooms.
In addition, with house studios that have natural lighting, it is important to check in advance the image of the space online, and also research how the impression of the lighting changes depending on the time of day.
POINT
5
Consider the importance of advanced preparation
In photography, advance preparation is an important factor that influences photograph quality.
Starting with sharing the concept and worldview with all staff participating in the shooting, such as the photographer, stylist, model, and hair and makeup artists, create a casting list with a time schedule in accordance with a cut list that lets you see which cuts are necessary and how they will be photographed, as well as the time required for photography. Have detailed meetings where you discuss arrangements for props and equipment, securing a parking lot, and a detailed plan for the day of shooting. It is important to have a shooting schedule that gives extra time to spare if needed.
| Reference Sites | |
|---|---|
| Choosing props | |
| Hair and makeup requests | |
| Stylist requests | |
| Photography assistant requests |
POINT
6
Confirm the details of the photographed cuts
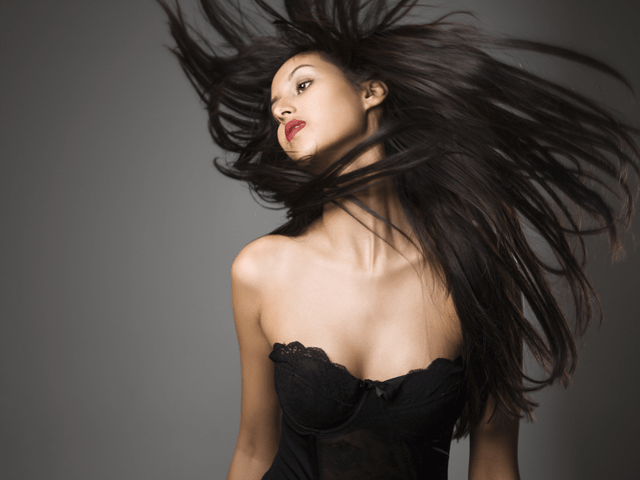
It differs depending on the objective, medium used, and concept, but on the day of shooting you can assume that you’ll be shooting many cuts. For example, when shooting human models, you’ll be taking shots from various angles, including full body shots, waist shots, chest shots, and close-ups, as well as clothes, hairstyles, facial expressions, and poses. With product photography, you’ll have different purposes, such as the angle, whether or not there will be props, the background, and clippings. Finally, with food photography, you’ll have to show a dazzling feeling.
In photography, your client may want to observe your shooting, or they may entrust you to proceed with shooting without needing any observation. So it’s extremely important to carefully check the details of each photography cut based on a previously made cut list and cast list. You should check if there are any omissions in the photography content and if the shoot is proceeding on schedule.
POINT
7
Consider the image processing

Digital development and retouching are two essential processes for finishing the photographs that were shot.
The shot photographs are usually recorded in a digital format called RAW files, and these files cannot be printed or displayed on the web in their original format.
Digital development is a process that converts these files to image data (such as JPEG/TIFF) that enables them to be displayed on the web and in printing, using specialized software for RAW files. With such applications, you can also adjust the brightness, tone, contrast, and other elements.
Retouching work allows you to adjust several elements in a photograph to create the ultimate, finished image. You can trim the photograph, change the size, remove unwanted elements that were accidently photographed, such as trash, adjust a person’s skin to make it smoother, adjust the image quality of a product to make it look clearer, and make edits and do processing, including combining clipped images with backgrounds.
Image processing is important work that determines the quality of your photographs. It is absolutely essential for advertising photographs.
POINT
8
Data format of the delivered product
When delivering the completed photographs, convert them to a resolution and image data format that suit the purpose and medium. You should also confirm how the photographs will be received and sent, such as through recorded media or online storage.
You should also clearly define the usage conditions of the photographs, such as the possibility of secondary usage in other mediums, and copyrights and rights of likeness.
Main data formats and features
| Content | |
|---|---|
| JPEG | This format is suitable for using online. It features full color and low data volume. |
| PNG | This format is suitable for using online. Can express images in full color, and transparently and semi-transparently. |
| TIFF | This format is suitable for printing. It features low image degradation and is used when a higher resolution is required. |
| PSD | This format is handled with Adobe Photoshop. It preserves layer information, and lets users easily process and edit images. |
POINT
9
Product and Model Photography Process
Here we explain the production process, from the quotation to delivery after first receiving your inquiry.
Please look here for details on the production process.
POINT
10
Production Cost Examples
The reference prices listed here for each medium are rough estimates. Please use them as a reference as you consider our services.
Please look here for information on production price examples.